Food Microbe Tracker PFGE Help
Contents
3.0 Adding PFGE Patterns to Food Microbe Tracker
3.1 Exporting PFGE Data from Bionumerics
4.0 Searching Food Microbe Tracker for Matches to a User Generated PFGE Image
5.0 Troubleshooting PFGE Files
1.0 Introduction
Food Microbe
Tracker has the ability to search the entire database for specific PFGE
patterns. Users of this database should
possess a reasonable proficiency in performing and interpreting PFGE data and
be familiar with the Applied-Maths Bionumerics software package for gel pattern analysis. Food Microbe
Tracker will also allow the uploading of user PFGE patterns for storage in the
database and/or comparison to database strains.
2.0 PFGE Protocols
To achieve
a standardized approach we have chosen specific protocols (references listed)
for the following organisms. All PFGE patterns for isolates from the Cornell
Food Safety Lab have been generated using these protocols.
E. coli O157:H7
Swaminathan B, Barrett TJ, Hunter SB, Tauxe RV; The CDC PulseNet Task
Force. PulseNet: the molecular subtyping
network for foodborne bacterial disease surveillance,
Barrett TJ, Lior H, Green JH, Khakhria R, Wells JG, Bell BP, et al.
Laboratory investigation of a multi-state food-borne outbreak of Escherichia
coli O157:H7 by using pulsed-field gel electrophoresis and phage typing. J Clin
Microbiol 1994;32:3013-7.
Listeria
monocytogenes
Graves LM, Swaminathan B. PulseNet standardized protocol for subtyping Listeria monocytogenes by macrorestriction and pulsed-field gel electrophoresis. Int J Food Microbiol 2001;65(1-2):55-62.
Strict adherence to these protocols is necessary to maintain accurate and reliable PFGE patterns.
3.0 Adding Single PFGE Patterns to
Food Microbe Tracker
To add PFGE data to Food Microbe Tracker you will need to perform PFGE using the standardized protocols listed above. To add your images to the Food Microbe Tracker database you will need to first convert the PFGE pattern to a text file using Bionumerics and the appropriate script (see Step 3.1 below). Detailed instructions for performing these tasks are listed and illustrated below. For instructions on how to do a batch addition of PFGE Pattens to Food Microbe Tracker, jump to the Add Batch PFGE section.
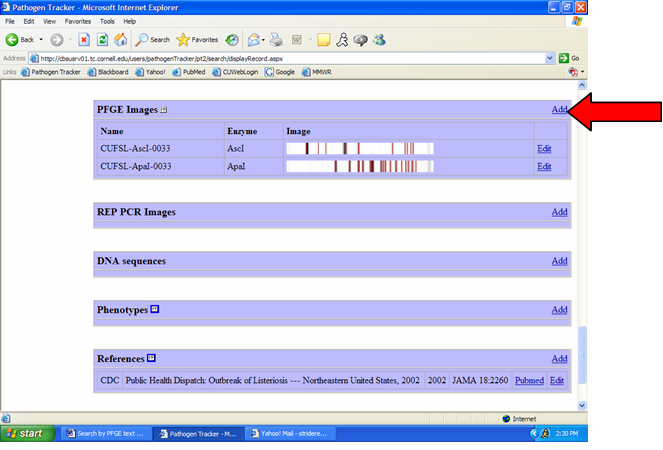
1) From the isolate display, click on “Add PFGE Image” (Figure 2).
Fig 2: Adding PFGE Image
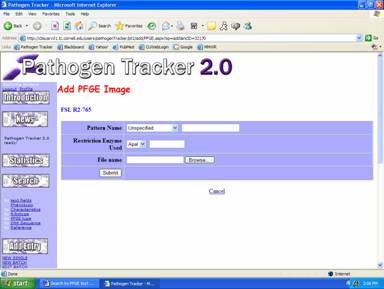
2)
You will be given options to choose a pattern name, restriction enzyme
used, and location of pattern script file (Figure 3).
Fig 3: PFGE Image Parameters
3)
To choose the file, click
browse and locate the exported text file that you created (instructions above) in Bionumerics.
4)
Once all appropriate
information is entered, click submit, and the results will be displayed.
3.1 Exporting PFGE Data from Bionumerics
2.5 or higher
1)
To export your PFGE image or
images
from Bionumerics you will need to make sure that you have Bionumerics version
2.5 or higher. If you need to upgrade, the file is
available from Applied-Maths by clicking here.
2)
Next you will need to
download the customized conversion script, which can be downloaded by clicking here. (NOTE: This script was made available in September 2011,
and supports exporting single and multiple PFGE images. Previous scripts
supported only single PFGE images and hence cannot be used for the "Batch
Upload" feature.) To install the script just copy the script in
the "scripts" subdirectory of the BioNumerics program folder (C:> Program
Files > BioNumerics > scripts > scripts > “export_fingerprint_info_new.BNS”). Restart Bionumerics.
*One caution: The fragment length calibration
curve must be available ("metrics curve" in the BioNumerics language) or the
script will not work. If you have not properly setup a global
control for normalization properly the script output will not work. Consult the Bionumerics manual for details
about properly setting up the global standard.
Make sure to set the resolution for the image to 400 pixels.
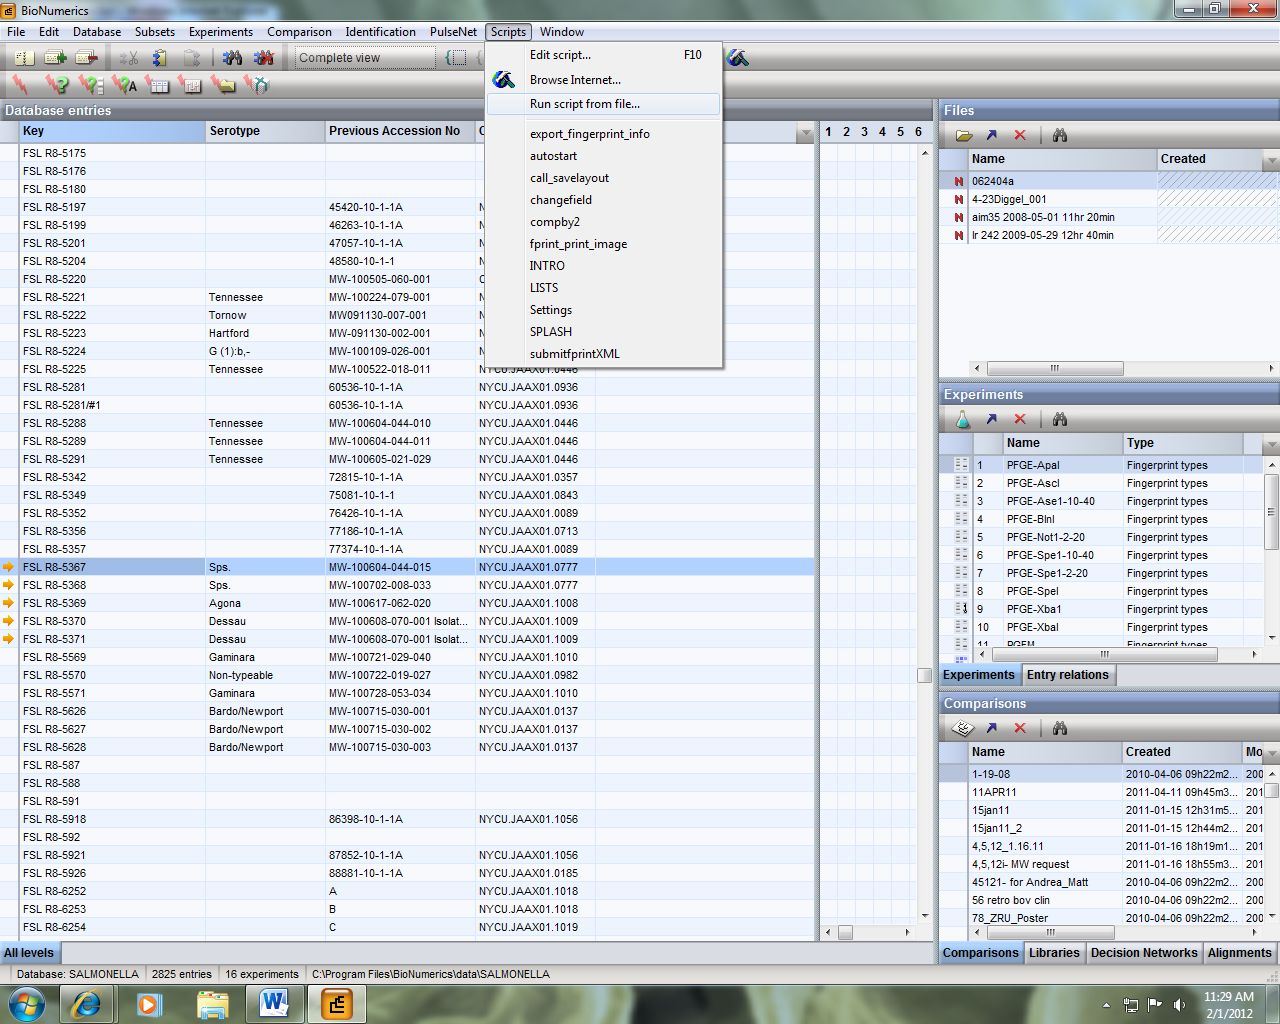
3) Select the entry key or keys that you want to export. Note that you can select multiple keys to export when preparing a file for a Batch PFGE Image Upload. Once selected, run the export fingerprint script from step 2 by selecting Scripts > Run script from file.
Figure 1: Exporting PFGE Data from Bionumerics
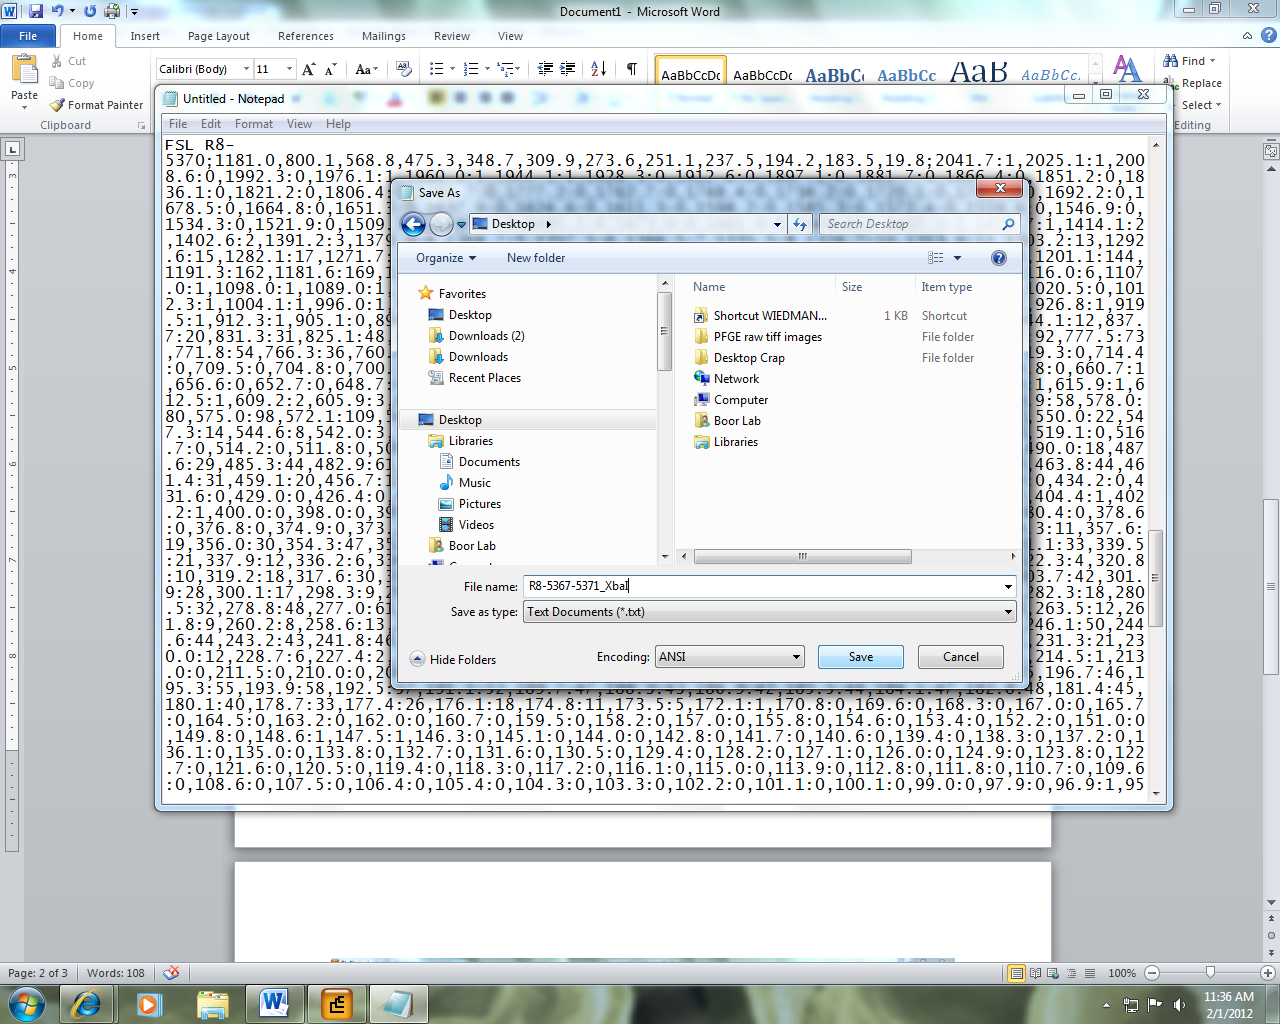
4) In BioNumerics, a window will pop up asking you want fingerprint info you want to export. Select the enzyme you wish you export and hit OK. In this example, it is XbaI.
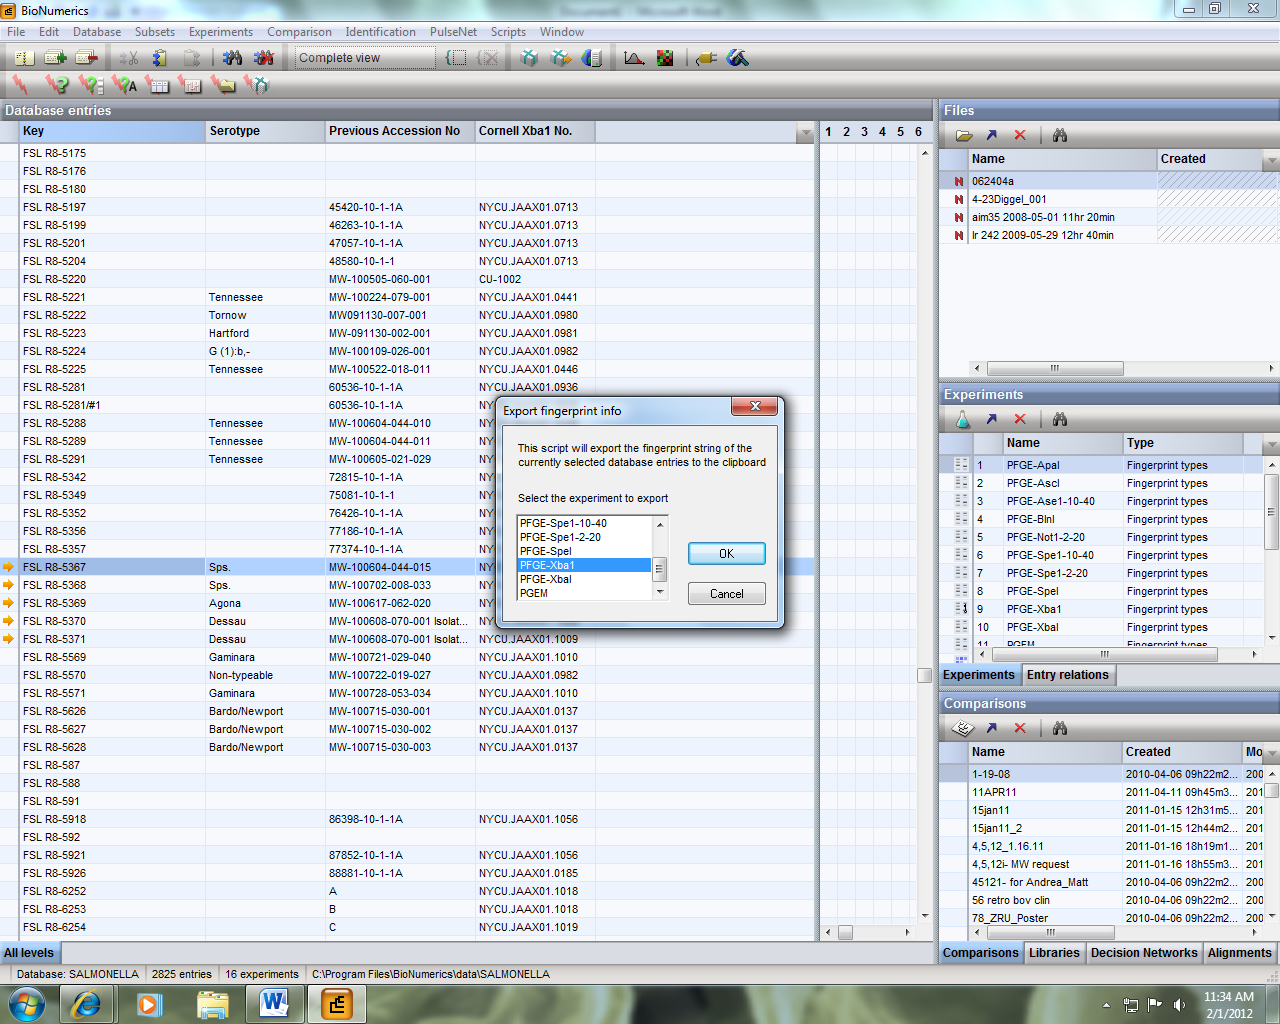
5) The export string has now been copied to the clipboard. Open Notepad and paste the string and save the file in .txt format. Note that this file will contain PFGE image data for the keys that you had selected. If you selected more than one key, all images will be contained in this single file. This will make it easier for batch PFGE image uploading later.
4.0 Searching Food Microbe Tracker by PFGE Script Image
1)
To search Food Microbe Tracker
for matches to a user generated PFGE pattern, you need to
export the PFGE pattern of interest by using the procedure outlined
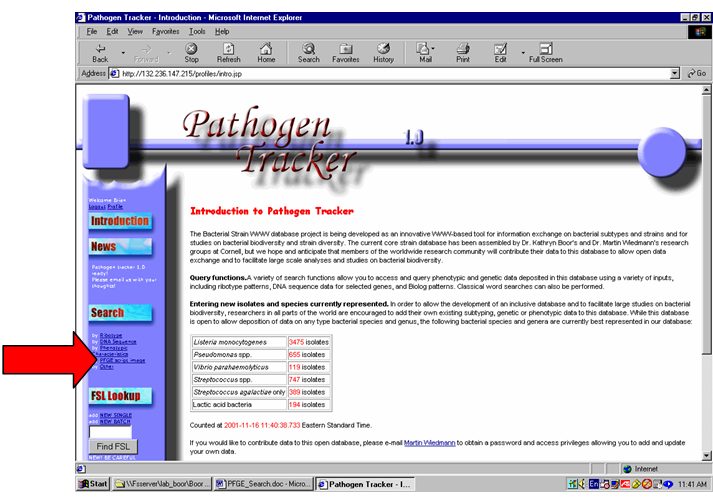
under 3.1. To begin a search, click on “Search by PFGE Script Image” from the
main menu (Figure 4).
Figure 4: Main menu -
"Search by PFGE Script Image"
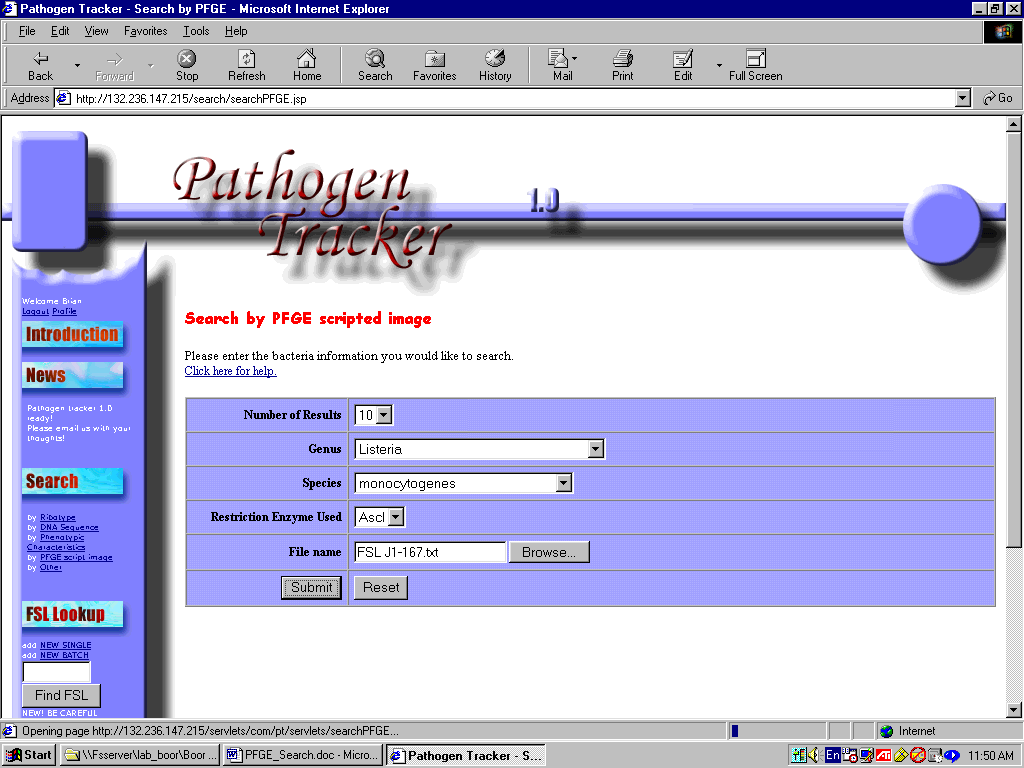
2) You will be given options to choose the
number of results (more will take longer), genus,
species, enzyme type, and text file.
3) To choose the file, click
browse and locate the exported text file that you created
(instructions above) in Bionumerics (Figure 5).
Figure 5: Entering PFGE Search Parameters
4) Once all appropriate
information is entered, click submit.
The results will be displayed as in Figure 6.
Figure
6: PFGE Pattern Search Results
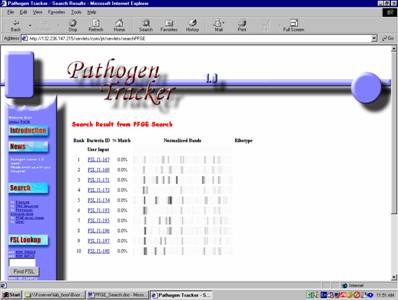
5) Isolates within the search
results window are hyper-text linked to the all visible records
within the database (demographics, PFGE type name, other genotypic and
phenotypic characteristics).
5.0 Troubleshooting PFGE Files
If you are having issues with uploading your PFGE files, please check the following suggestions:
- Make sure that your FSL ID is formatted with FOUR ending digits. For example, instead of "FSL V2-001" use "FSL V2-0001". This change in FSL ID formatting ocurred in June 2012.
- For Batch PFGE files, you must use the new Bionumerics script found on this webpage as it supports multiple PFGE images in a single file. Single PFGE additions and PFGE searches can still be performed on any old PFGE files generated with the old Bionumerics script (pre-Sept 2011).
- For Single PFGE additions, if you are using the new Bionumerics script, make sure that the FSLID within the file matches the current isolate you are updating.